Saving an image from the webpage is straightforward. Simply right-click and select “save image as”. But what if you have hundreds or even thousands of images that need to be saved? Will the same trick work? At least not for me. It’s very easy with the help of an image crawler, we’ll introduce several examples you may encounter with detailed steps in this article.
Before starting, you need to download and install Octoparse on your devices, it’s free to use. It can not only help you scrape images without coding but also other public content from any web page. You can also watch the video below to learn the example of downloading images in bulk from Aliexpress with Octoparse.
Example 1: Fetching Images Directly from Webpage
To demonstrate, we are going to scrape dogs’ images from Pixabay.com. To follow along, search for “dogs” on Pixabay.com then you should arrive at this page: https://pixabay.com/images/search/dogs/
Step 1: Enter the URL
Click “+ Task” to start a new task under Advanced Mode. Then, input the URL of the target webpage into the text box and click “Save URL”.
Step 2: Select the images you want to crawl
Next, we are going to tell the bot what images to fetch. Click on the first image, the Action Tips panel now reads “Image selected, 100 similar images found”. Go on to select “Select all”, then “Extract image URL in the loop”.
Step 3: Crawl images across pages
Of course, we don’t just want the images from page 1, but from all pages (or as many pages as needed). To do this, scroll down to the bottom of the current page, spot the “next page” button, click on it.
We obviously want to click the “next page” button many times, so it makes sense to select “Loop click the selected link” from the Action Tips panel.
Now, just to confirm if everything was set up properly. Toggle the workflow switch in the upper right corner. Also, check the data panel and make sure we have the desired data extracted correctly.
Step 4: Crawl with Auto-scrolling settings
There’s just one more thing to tweak before running the crawler.
While debugging, I noticed that the HTML source code is being refreshed dynamically as one scroll down the webpage. In other words, if the webpage is not scrolled down, we will not be able to get the corresponding image URLs from the source code. Luckily, Octoparse does auto-scroll down easily.
We will need to add auto-scroll both when the website loads for the first time as well as when it paginates.
Click on “Go to Webpage” from the workflow. On the right side of the workflow, spot “Advanced options”, and check “Scroll down to the bottom of the page when finish loading”.
Then, decide how many times to scroll as well as at what pace. Here I set scroll times = 40, interval=1 second, scroll way = scroll down for one screen. This basically means Octoparse will scroll down one screen for 40 times with 1 second between each scroll.
I did not come up with this setting randomly but did a bit of fine-tunning to make sure this setting works. I also noticed that it was essential to use “Scroll down for one screen” as opposed to “scroll down to the bottom of the page”. Mainly because the image URLs we need only get refreshed to the source code gradually.
Apply the same setting to the pagination step. Click on “Click to paginate” on the workflow, use the exact same setting for auto-scroll.
Step 5: Start your crawler
That’s it. Let’s run the crawler and see if it works. Click “Start Extraction” from the upper left-hand corner. Pick “local extraction”. It basically means you’ll be running the crawler on your own computer instead of the Cloud server.
Example 2: Scrape Full-sized Images
Question: What if you need the full-sized images? For this example, we’ll use the same website: https://pixabay.com/images/search/dogs/ to demonstrate how you can get the full-sized pictures.
Step 1: Start a new task
Start a new task by clicking on “+ Task” under Advanced mode. Input the URL of the target webpage into the text box then click “Save URL” to proceed.
Step 2: Select the images you want to crawl
Unlike the previous example where we could capture the images directly, we’ll now need to click into each individual image in order to see/fetch the full-sized image.
Click on the first image, the Action Tips panel should read “Image selected, 100 similar images found”.
Select “Select all”. Then, “Loop click each image”.
Step 3: Extract URLs of the images
Now that we’ve arrived on the page with the full-sized image, things are a lot easier.
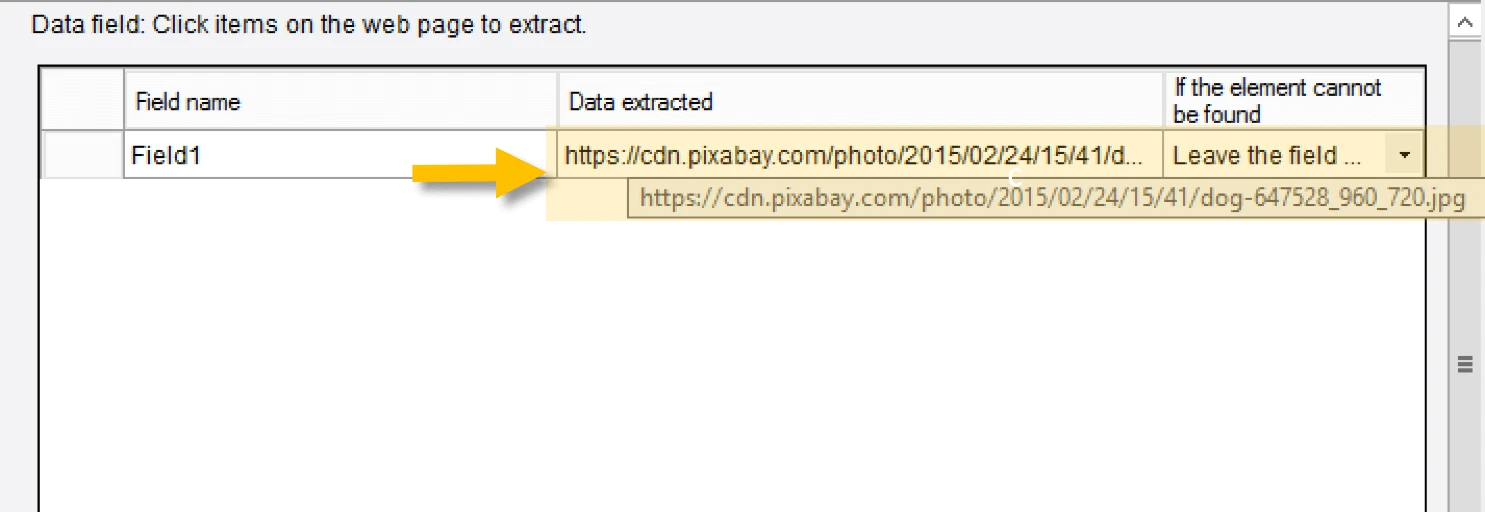
Click on the full-sized image, then select “Extract the URL of the selected image”. As always, check the data panel and make sure we have the desired data extracted correctly.
Step 4: Add pagination to crawl across pages
Click on “Go to the webpage”, spot the “Next page” button then click on it. Select “Loop clicked the selected link” on the Action Tips panel.
Step 5: Run your crawler
Now, test running the crawler. And you can get the images quickly.
Example 3: Getting Full-sized Images from Thumbnails
I am sure you have seen something similar when you shop online or if you happen to run an online store. For product images, thumbnail images are definitely the most common form of image display. The use of thumbnails substantially reduces bandwidth and loading time, making it much more friendly for people to browse through different products.
There are two ways to extract the full-sized images from the thumbnails using Octoparse.
Option 1: You can set up a loop click to click through each of the thumbnails, then proceed to extract the full-sized image once loaded.
Option 2: As most thumbnail images share exactly the same URL pattern as that of the corresponding full-sized images but only with a different number indicative of the different sizes, it makes sense to extract the thumbnail URL and then replace the thumbnail size number with that of the full-sized counterparts. This can be done easily with Octoparse’s built-in data cleansing tool.
Since we’ve already gone through something similar to Option 1 in Example 2, I will elaborate on Option 2 in this example. We will use a product page on Flipcart.com to demonstrate: https://www.flipkart.com/philips-bt40-portable-bluetooth-speaker/p/itmexgkftbzuajvr
Before we start the work, it’s worthwhile to confirm if this tactic can be applied by looking at the image URL for the thumbnail and its full-sized counterpart. So I handpicked one of the thumbnails to check.
|
Thumbnail URL: https://rukminim1.flixcart.com/image/128/128/jatym4w0/speaker/mobile-tablet-speaker/v/u/7/philips-in-bt40bk-94-original-imafybc9ysphpzhv.jpeg?q=70 Full-size URL: https://rukminim1.flixcart.com/image/416/416/jatym4w0/speaker/mobile-tablet-speaker/v/u/7/philips-in-bt40bk-94-original-imafybc9rqhdna8z.jpeg?q=70 |
Notice the only difference between these two URLs is the number indicative of the image size. “128” for the thumbnail and “416” for the full-sized image. This would mean that as long we have the thumbnail URLs extracted, we can convert them into full-sized URLs simply by replacing “128” with “416”. Let’s see it in action.
Step 1: Enter the URL
Launch the Octoparse App, start a new task, then input the target URL into the text box.
Step 2: Select the thumbnail image
Click on the first thumbnail image. The Action Tips panel now reads “Element selected. 5 similar buttons found.” Octoparse recognized the remaining thumbnails automatically. Select “Select all”, and then select “Extract the text of the selected elements”. This is obviously not what we want, but we can change it later.
Toggle the “Workflow” and switch at the upper right corner. Notice we had nothing extracted.
Well, this is kinda expected as there was apparently no text to be extracted. What we really need to fetch is the image URL hidden in the Html source code. So now we’ll need to change the type of data to extract.
Step 3: Extract the URLs of the images
Hit the “Customize” icon (little pencil) at the bottom, click “Define data extracted”, check “Extract outer HTML, including source code, text for format and image”. Click “OK” to save.
Step 4: Use RegEx to match the URLs
Use the Regular Expression tool to match the image URL from the whole chunk of outer HTML.
Click the “Customize” icon again. This time, click “Refine extracted data”. There are a couple of data cleaning steps to add. Click “Add step”, then select “Match with regular expression”. If you are not familiar with the regular expression, feel free to use the Built-in RegEx tool which I like a lot.
The RegEx tool is rather self-explanatory. Input the beginning and the end of the desired data string. Click “Generate” and then the corresponding regular expression is generated. Click “Match” to see if the desired data can be matched successfully. If you expect to get more than one line matched, check for “Match all”.
Are we done? Close, but not yet. Remember this is only the thumbnail URL and we still need to replace “128” with “416” in order to make them full-sized image URLs.
Click “Add step” one more time. Select “Replace”. Replace “128” with “416”. Click “Evaluate”. Finally, we have the URL we need.
Step 5: Test run the crawler
In the example above, we had each image URL extracted as an individual row. What if you need to get the URLs extracted all together? This can be done by extracting the outer HTML of all the thumbnails at once. Then, use RegEx to match the individual URLs, and replace the size number, then you’ll get all the full-sized image URLs fetched into one single row.
1) Load the website and click on one of the thumbnails. Click the “Expand” icon at the lower right corner of the Action Tips panel until the whole thumbnail section is highlighted in green, which basically means they are selected.
2) Select “Extract Outer HTML of the selected element” on the Action Tips panel.
3) Toggle back to workflow mode. Repeat the same data cleansing steps to match the individual thumbnail URLs.
4) Check “Match All” this time as we need to match more than one URL from the extracted HTML code.
5) Again, replace “128” with “416”. Lastly, we have all the full-sized image URLs extracted into one single line.
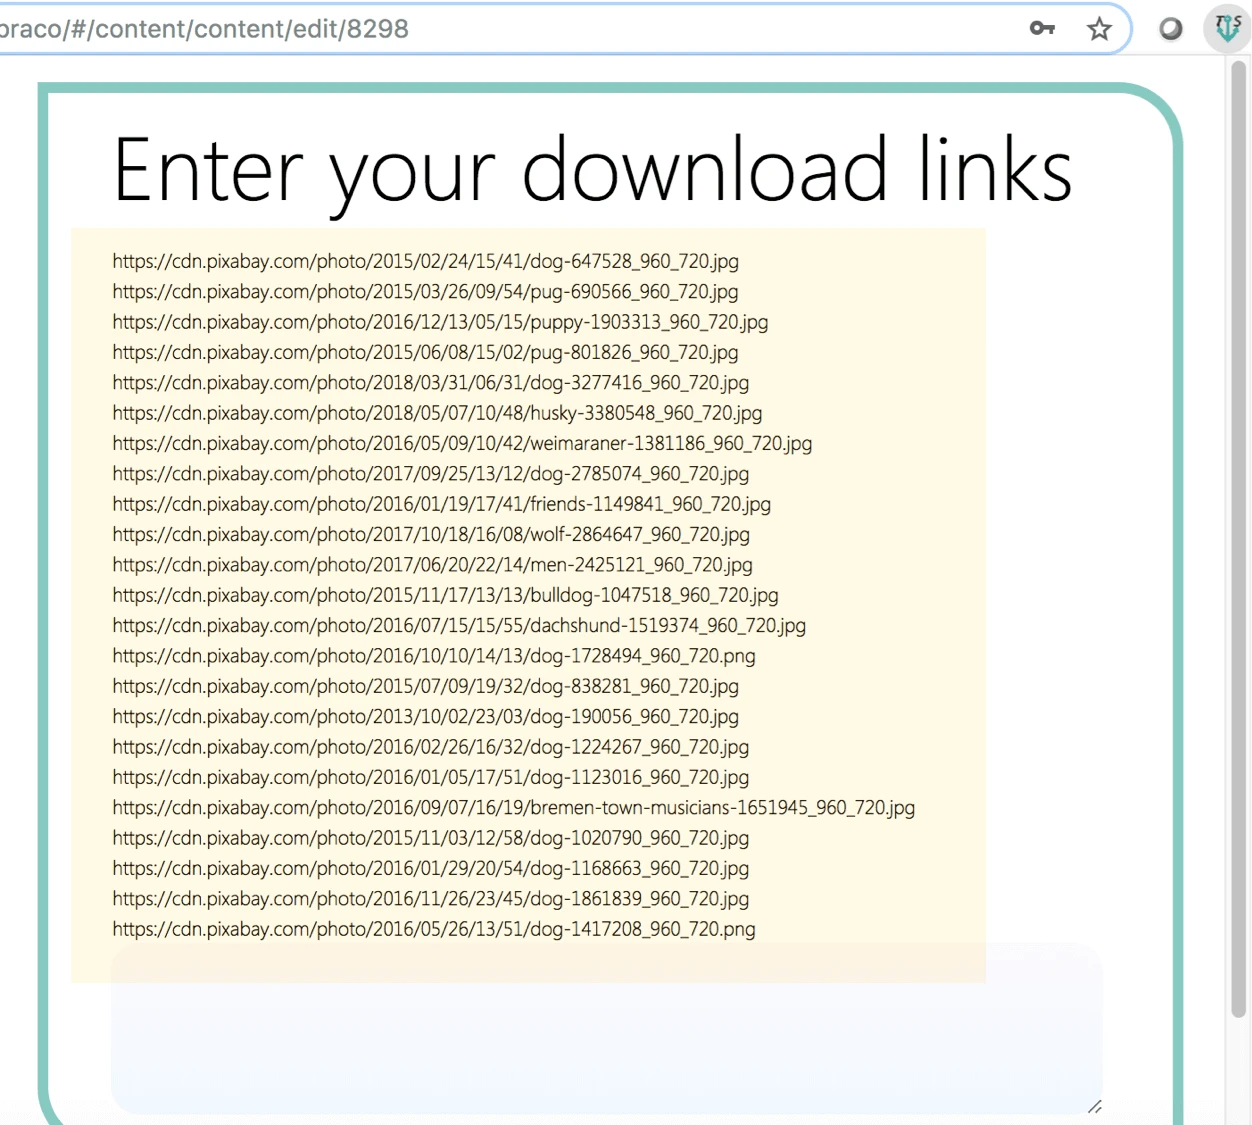
Now that we have the image URLs extracted, let’s go ahead and get the actual image files downloaded using TabSave.
1) Export the data extracted to Excel or similar formats.
2) Copy and paste the image URLs to TabSave.
3) Start to download the files by clicking the download icon at the bottom.
I hope this tutorial gives you a good start on extracting images/data from the web. That said, each website is different. Depending on your target websites, some adjustments may be needed to make it work. Yet, the general concept and workflow can be extended to most websites. If you have any questions about how to set up a crawler within Octoparse, you are always welcome to check the Octoparse Help Center or reach out to support@octoparse.com.