Indeed, is one of the top job sites where people across the globe look out for job postings in different sectors and companies. With job postings updated regularly on the site, the data is huge and if you wish to collect this data for creating a job board, comparison, market analysis, or any other purpose, doing it manually is practically impossible.
So, we’ll introduce the best Indeed scraper and other methods to scrape Indeed job posting data easily both coding and no-coding.
Does Indeed Allow Web Scraping
Yes, Indeed allows scraping where the job data from the site can be extracted using Indeed API. The data extracted can be used for Indeed analyzing data assessments. Though using Indeed API manual data extraction can be done, the process is not only time-consuming, and hassle, but also expensive.
Here, a third-party data scraper works as a cost-effective and easier method to get the desired data from the site. But you should pay attention to avoiding personal data collection and illegal data usage.
How to Scrape Indeed Data Like Jobs, Salaries, and Company Reviews
Using a professional scraping tool allows quick data extraction from Indeed, we suggest Octoparse. The software works on both Windows and Mac systems. It allows extracting almost all needed data from Indeed like jobs, salaries, reviews of the companies, etc.
You can also use the advanced functions with AJAX, XPath, infinite scrolling, pagination, Cloud service, IP rotation, etc. Or you can just use the auto-detection mode or the preset Indeed templates to finish the process almost automatically.
Steps for Indeed web scraping with Octoparse
Step 1: Launch Octoparse and paste the Indeed site link
Open Octoparse after you have downloaded and installed it on your device. Paste the link you need to scrape from Indeed to the main interface of Octoparse and proceed.
Step 2: Customize workflow with pagination
You’ll enter the auto-detect mode by default, you can cancel if you want to set the advanced mode. Anyway, create a workflow and you can set the pagination if you need to scrape multiple pages. Modify the XPath of each element if needed.
Step 3: Get job posting data from Indeed
Finally, click on the Run button to start scraping the Indeed data, and you can download the file in Excel or CSV format as you like. If you want to check the detailed steps, you can move to Octoparse Indeed Data Scraping Guide or watch the video tutorial below.
Indeed preset scraping templates
You can also choose the preset data scraping templates from Octoparse. These scraping templates are designed for popular websites, and you can get data within a few clicks. For Indeed, you can extract job details like location, description, post time, etc. by URL listing or keyword. Launch Octoparse and find it from the Templates panel, or click on the online Indeed scraper below to have a try.
Indeed Job Scraper (by URL)
This template is perfect for targeted data extraction when you have specific Indeed search result URLs you want to monitor. It delivers precise control over which job listings to track by allowing you to input direct URLs from Indeed search pages.
Data you’ll get with this template:
- Site and search metadata (search terms, location, input URL)
- Job titles, IDs, and URLs
- Job types and salary details
- Complete job descriptions
- Company information (name, URL, rating, review count)
- Posting dates and validity periods
- Application links
Use cases:
- Monitoring specific job searches on a regular schedule
- Tracking hiring patterns in targeted locations or companies
- Collecting data from curated Indeed searches
- Performing competitive intelligence on specific job markets
- Building custom job databases with precise filtering
Try the template below to monitor jobs today!
https://www.octoparse.com/template/indeed-job-scraper-by-url
Indeed Job Scraper (by Keywords)
This keyword-driven template makes it easy to conduct broad market research by allowing you to search based on job titles, keywords, company, locations and URLs. Simply open the following template, input your search parameters, and the template handles the rest automatically.
Data you’ll get with this template:
- Comprehensive search metadata: search term and location, input URLs and search results
- Job titles, IDs, and direct URLs
- Employment types and compensation data
- Full job descriptions with requirements and salary ranges
- Company profiles (name, URLs, etc.) and reputation scores (Rating and review count)
- Posting timestamps and expiration dates
- Quick-apply links
Use cases:
- Conducting market research across multiple job categories
- Identifying emerging job trends and skill demands
- Benchmarking salary ranges by keyword and location
- Discovering new job opportunities across regions
- Analyzing hiring volume for workforce planning
https://www.octoparse.com/template/indeed-job-scraper-by-keywords
Apify Indeed Scraper vs. Octoparse Indeed Job Scraper
We know some of you have no idea how to choose from so many Indeed Scrapers in the market, especially between Apify Indeed Scraper and Octoparse Indeed Job Scraper. Here I’ll make a comparison.
1. Scraping Volume
Public user feedback on Apify’s Indeed Scraper template shows clear limitations in scraping volume and precision. Users report issues such as:
- “Scraper didn’t find any jobs” even when matching listings exist
- Output seemingly capped around 1,000 results per run
- Inaccurate keyword matching, returning unrelated job titles
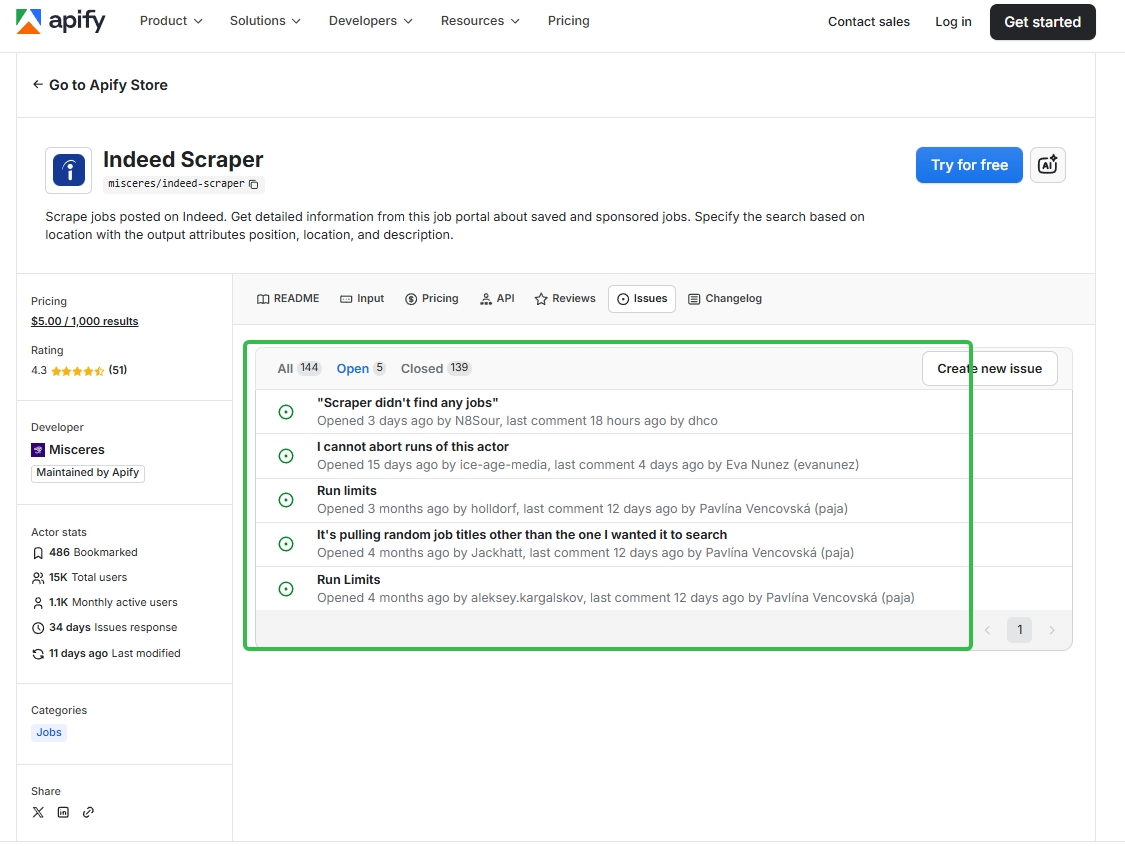
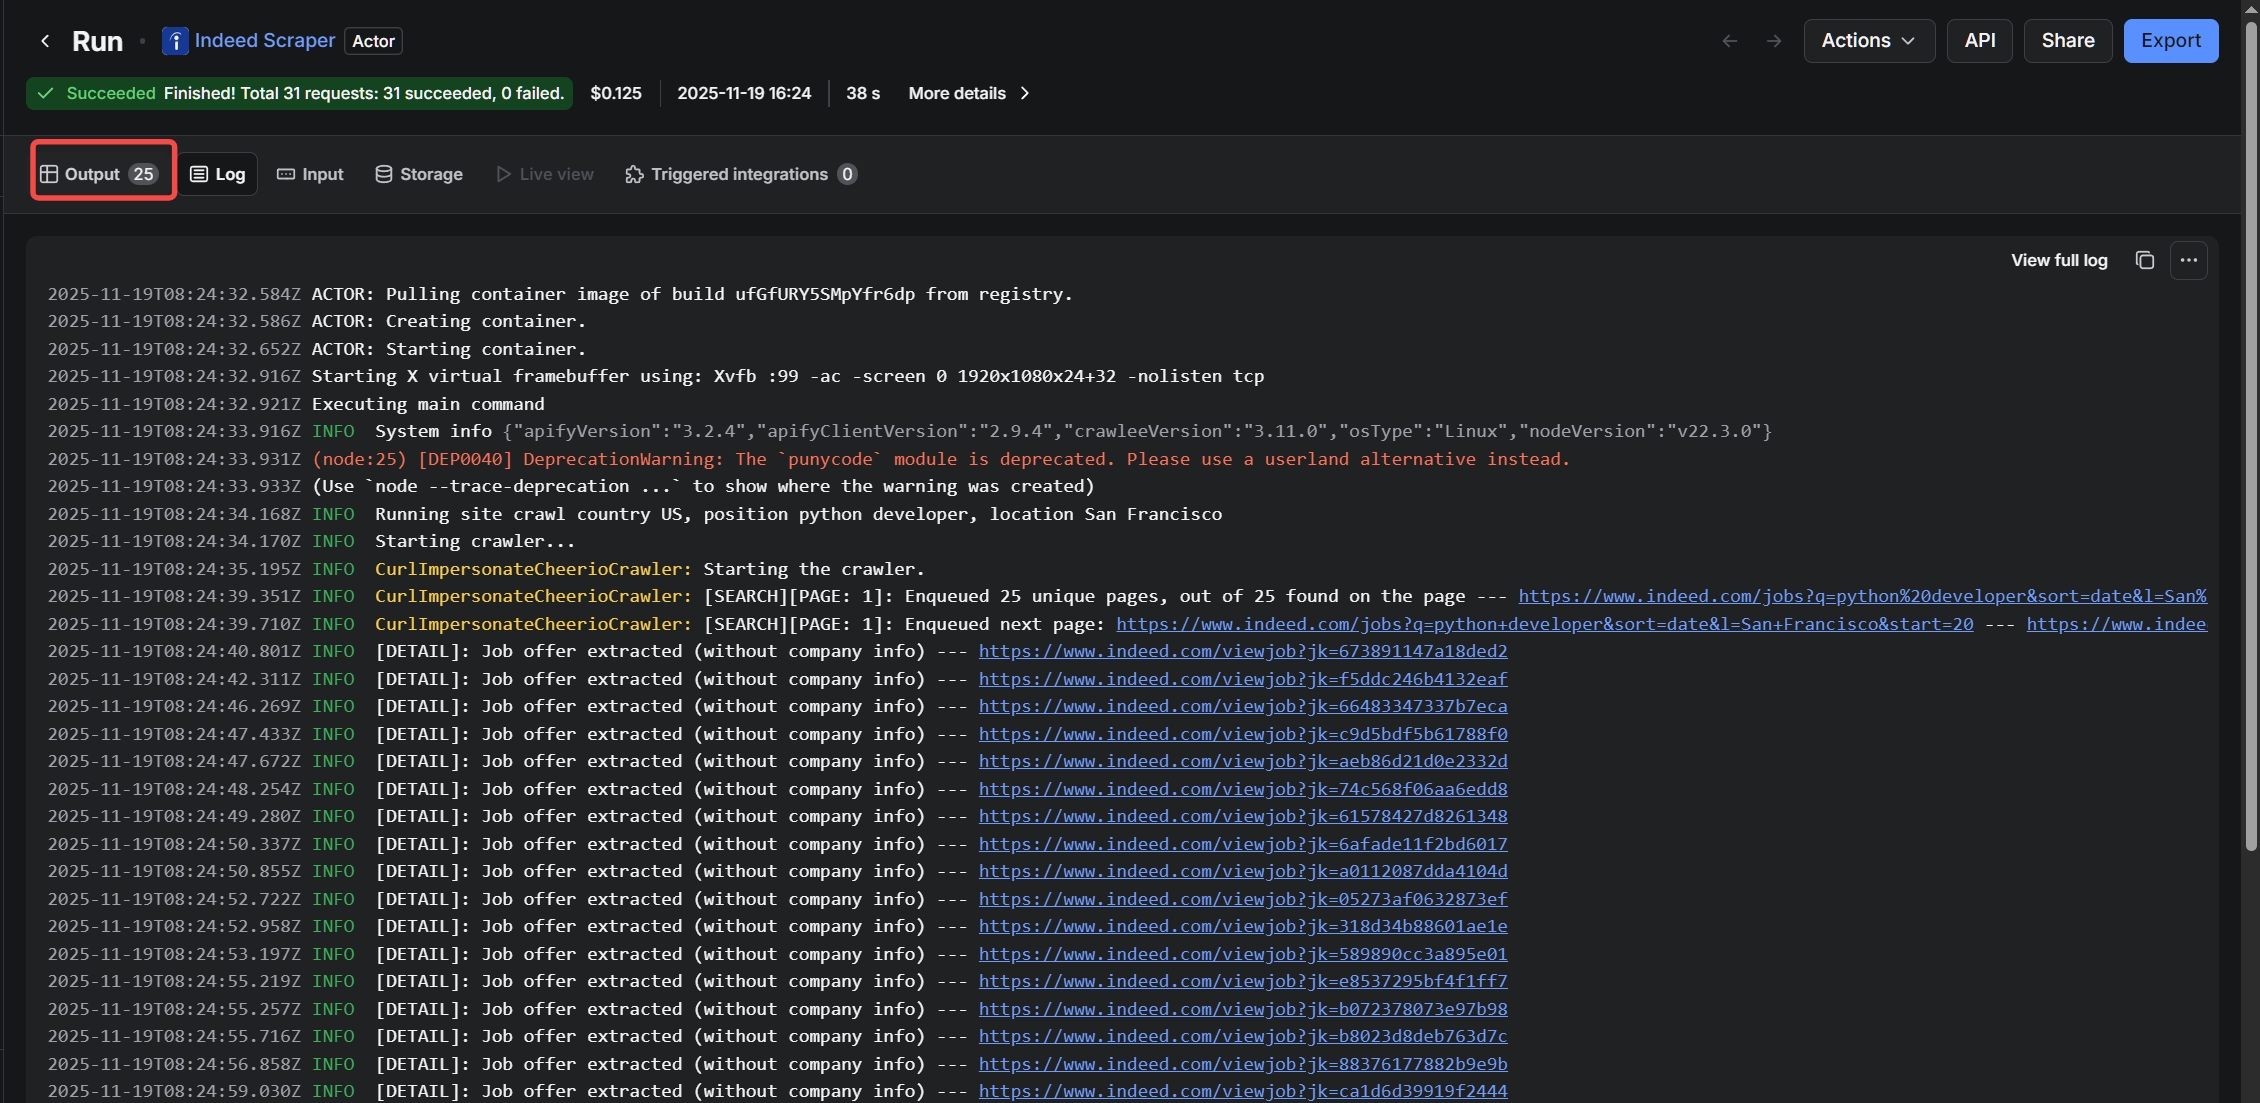
Some time ago, we were even only able to collect 25 pieces of data using this template.
These issues suggest the template is not well suited for large-scale or precise job scraping.
By contrast, Octoparse delivers both scale and data accuracy.
In a single test run, Octoparse successfully extracted 826 job records in one task, with zero duplicates and stable execution, as shown below. This result reflects actual available job listings rather than partial or mismatched outputs.

With configurable pagination and extraction rules, Octoparse supports complete, accurate, and scalable Indeed job data collection.
2. Cost Efficiency
Apify charges $5 per 1,000 results, which can become costly for users running high-volume or recurring scraping tasks—especially given the volume and accuracy issues mentioned above.
In contrast, Octoparse offers a significantly lower cost at $2 per 1,000 results under comparable scenarios, making it more suitable for teams or individuals who need to collect job data at scale over time.
3. Which One Should You Choose?
- If you only need small, occasional datasets and prefer a ready-made API template, Apify may be sufficient.
- If you care about lower long-term cost, higher control, visual debugging, and scalable scraping, Octoparse is the more cost-effective and stable choice for Indeed job data collection.
Scraping Indeed Job Postings with Python
Python is a versatile programming language that can be used for multiple tasks and if you are good with using the language and creating codes, Python can also be used for scraping Indeed job postings.
To extract Indeed data, we would use Beautiful Soup (bs4) which is a Python library for getting the data from HTML and XML files. Since the module is not built-in with Python, the below-given command will help in its installation.
Next, for sending the HTTP/1.1, a request command is to be given
Next, comes the step for importing the requested modules and requesting the URL to get a response.
Next, convert the data into HTML code and then Parse the HTML content using bs4.
Parameters:
Finally, the code has to be used for data extraction.
Now, you can get the job posting data from Indeed easily with the 2 methods above. One is using Octoparse without coding, and the other is using Python which asks for coding knowledge. No matter which one you choose, hope that your problem can be solved.