As business competition grows increasingly fierce, web crawlers have become essential tools for gathering competitor intelligence from the internet. Though Python often comes to our mind first for this task thanks to its powerful libraries like BeautifulSoup and Scrapy, JavaScript also offers robust capabilities for web scraping, particularly when dealing with dynamic content.
Why Choose JavaScript in Web Crawling?
To help you make the right choice, we have outlined several situations where choosing JavaScript over Python might be a better idea:
- Client-Side Rendering(Dynamic Content): Many modern websites use JavaScript frameworks (e.g., React, Vue) to render content dynamically on the client side. Scraping such sites is more straightforward with JavaScript because it can interact directly with the same environment.
- Browser Automation: Tools like Puppeteer provide excellent browser automation capabilities, allowing you to scrape content that requires interaction (clicks, scrolling, etc.).
- Integration with Web Projects: If you’re already working on a JavaScript-based web project, using JavaScript can streamline your workflow and reduce the need to switch between different languages.
However, if your project involves extensive data analysis or machine learning post-scraping, python will be more suitable. For more details, you can learn How to Crawl Data With Python.
Basics of Web Crawling with JavaScript
Before diving into specific tools and methods, let’s cover the basics of web crawling with JavaScript.

- Sending HTTP Requests
To scrape a website, first, we need to fetch its HTML content. This is done by sending HTTP requests. For example:
Here, we’re using Axios, a promise-based HTTP client, to send a GET request to http://example.com and log the HTML response.
- Parsing HTML Documents
Once you have the HTML content, you need to parse it to extract the desired data. Cheerio is a popular library for this purpose.
We use Cheerio to load the HTML and then select the <title> element to extract and log its text content.
- Handling Asynchronous Operations
JavaScript provides a way to handle asynchronous operations more easily using async and await, such as waiting for HTTP requests or interacting with dynamically loaded content. These keywords make the code look more like regular, sequential code, which is easier to understand and write.
The async keyword makes the scrapeWebsite function asynchronous, allowing us to use await to wait for the Axios request to complete before proceeding.
Three Ways to Use JavaScript in Web Crawling
Depending on the type of website you’re scraping, you might use different JavaScript tools and techniques.
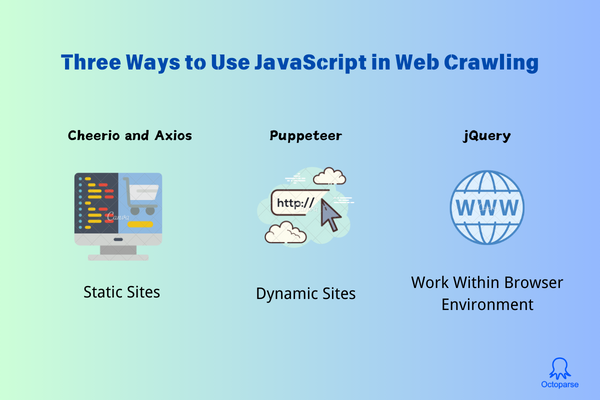
Static Sites: Cheerio and Axios
Let’s go through an example of crawling a static e-commerce site using JavaScript. For this example, we’ll use two popular libraries: Axios for sending HTTP requests and Cheerio for parsing the HTML.
- Install Dependencies
First, you need to install Axios and Cheerio. If you haven’t already, you can install them using npm (Node Package Manager):
- Create a Script
Create a JavaScript file, for example, scrapeEcommerce.js, and open it in your favorite code editor.
- Import Required Modules
In your script, import Axios and Cheerio:
- Define the Target URL
Choose the e-commerce website you want to scrape. For this example, we’ll use a hypothetical e-commerce site http://example-ecommerce.com. Replace this with the actual URL you want to scrape.
- Fetch the HTML Content
Use Axios to send a GET request to the target URL and fetch the HTML content.
- Parse the HTML and Extract Data
Use Cheerio to parse the HTML and extract the desired information. Let’s say we want to scrape product names and prices.
Key points explanation
axios.get(url): Sends a GET request to the target URL and returns a promise..then(response => { ... }): If the request is successful, the HTML content of the page is available inresponse.data.cheerio.load(html): Loads the HTML content into Cheerio, allowing us to use jQuery-like syntax to traverse and manipulate the DOM.$('.product').each((index, element) => { ... }): Selects all elements with the classproductand iterates over them. For each product element:$(element).find('.product-name').text().trim(): Finds the product name element and extracts its text content.$(element).find('.product-price').text().trim(): Finds the product price element and extracts its text content.
products.push({ name, price }): Adds the extracted product information to theproductsarray.console.log(products): Logs the extracted product information to the console.
Complete Example Script
Here’s the complete example script:
Customizing for Your Target Site
- Selectors: The
.product,.product-name, and.product-priceselectors are based on the structure of the hypothetical e-commerce site. You’ll need to inspect the actual site’s HTML structure and adjust these selectors accordingly. - Additional Data: If you want to scrape more data (e.g., product images, links, descriptions), find the corresponding HTML elements and extract their content similarly.
Dynamic Sites: Puppeteer
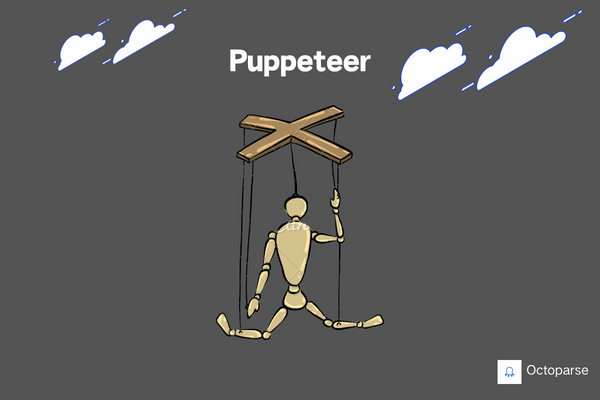
Dynamic sites often rely on JavaScript to load content, which means the content isn’t immediately available in the initial HTML response. Using Puppeteer allows us to interact with web pages in a way that mimics real user interactions. As a Node.js library developed by Google, Puppeteer provides a high-level API to control Chrome or Chromium browsers and can handle these dynamic pages effectively.
To do it, first:
- Import Puppeteer
In your JavaScript file, import Puppeteer:
- Launch a Browser and Open a Page
- Navigate to the Target URL
Navigate to the website you want to scrape. For example, let’s say we want to scrape a dynamically loaded product list from http://example-dynamic-ecommerce.com:
The { waitUntil: 'networkidle2' } option ensures that the page is considered fully loaded when there are no more than two network connections for at least 500 ms.
- Wait for Content to Load
If the content is loaded dynamically via JavaScript, you may need to wait for specific elements to appear on the page:
- Extract Data
Use Puppeteer’s page.evaluate() method to run code within the context of the page and extract the desired data:
- Close the Browser
After extracting the data, close the browser:
Complete Example Script
Here’s the complete example script for scraping a dynamic site using Puppeteer:
Additional Features and Tips
- Handling Pagination: If the site has multiple pages, you can automate clicking on pagination links and scrape data from each page.
- Taking Screenshots: Use
page.screenshot()to capture screenshots of the page, which is useful for debugging.
Interacting with Forms: You can fill out and submit forms using page.type() and page.click().
Waiting for AJAX Requests: Use page.waitForResponse() to wait for specific network requests to complete.
Running Headless or Headful: Puppeteer runs in headless mode by default (no UI). For debugging, you can run it in headful mode by passing { headless: false } to puppeteer.launch().
Work Within Browser Environment: jQuery
Scraping data from websites can sometimes be done directly within the browser environment using jQuery. This method can be particularly useful when you need to quickly extract data from a web page you’re currently viewing.
What is jQuery?
jQuery is a fast, small, and feature-rich JavaScript library. It makes things like HTML document traversal and manipulation, event handling, and animation much simpler with an easy-to-use API that works across a multitude of browsers. For scraping purposes, jQuery provides powerful tools to select and manipulate HTML elements.
Why Use jQuery in the Browser?
- Quick Prototyping: Quickly test and extract data directly from the browser console without setting up a full scraping environment.
- Real-Time Interaction: Directly interact with the DOM and see immediate results.
- No Additional Setup: No need to install additional libraries or set up a backend environment.
Step-by-step tutorial:
Here’s a detailed guide on how to use jQuery for web scraping within the browser environment.
- Open the Browser Console
- Open your web browser.
- Navigate to the website you want to scrape.
- Open the browser console (usually accessible by pressing
F12orCtrl+Shift+I).
- Load jQuery
If the website does not already include jQuery, you can manually load it by pasting the following code into the console:
Wait a few seconds for the script to load.
- Scrape Data Using jQuery
Once jQuery is loaded, you can use it to select and extract data from the web page. Here’s an example of how to scrape product names and prices from a hypothetical e-commerce site:
- Identify the HTML Structure: Inspect the elements you want to scrape using the browser’s developer tools. Let’s assume products are within elements with the class
product, and each product has aproduct-nameandproduct-priceclass. - Write jQuery Code: Use jQuery selectors and methods to extract the data.
Script Explanation
$('.product').each(function() { ... }): Selects all elements with the classproductand iterates over them.$(this).find('.product-name').text().trim(): Finds the child element with the classproduct-name, extracts its text content, and trims any surrounding whitespace.$(this).find('.product-price').text().trim(): Similarly, extracts and trims the text content of theproduct-priceelement.products.push({ name: name, price: price }): Adds the extracted product name and price to theproductsarray.console.log(products): Logs the extracted data to the console.
Full Example Code
Here’s the full example code you can run directly in your browser’s console:
- Advanced Tips
- Handle Pagination: If the site uses pagination, you may need to navigate through each page and repeat the scraping process. This can be done manually in the browser or automated with a script in a headless browser like Puppeteer.
- Extracting Attributes: If you need to extract attributes (e.g.,
hrefof links,srcof images), use the.attr()method.
- Filtering Data: Use jQuery’s
.filter()method to narrow down the selection of elements based on certain criteria.
Tips for Ethical Issues
- Respect Robots.txt and Legal Guidelines
Robots.txt
robots.txt is a text file placed in the root directory of a website that tells crawlers which sites can be scraped and which are off-limits. It’s a also standard used by websites to manage crawler traffic and to prevent web servers from being overloaded.
Following robots.txt shows respect for the website owner’s preferences and helps maintain good web scraping practices while ignoring it can lead to your IP being blocked, and in some cases, legal action.
So always check a website’s robots.txt file to understand its scraping policies and ensure you’re not violating any legal guidelines.
You can access the robots.txt file of a website by appending /robots.txt to its domain. For example, https://www.example.com/robots.txt.
Then, you can see a file like this:
Within the file,
User-agent: *means the rules apply to all web crawlers.Disallow: /private/andDisallow: /temp/mean crawlers should not access these directories.Allow: /public/means crawlers are allowed to access this directory.
Legal Guidelines:
- Terms of Service (ToS): Always review the website’s Terms of Service before scraping. Many websites explicitly mention in their ToS whether scraping is allowed or prohibited.
- Copyright Laws: Be mindful of copyright laws. Just because you can access the data doesn’t mean you can use it freely.
- GDPR and Data Privacy: If scraping user data, ensure compliance with data privacy regulations like the General Data Protection Regulation (GDPR) in Europe.
- Use Throttling and Proxies
Throttling
Sending too many requests too quickly can overwhelm the target server, leading to performance issues and potential blocking of your IP address. Thus, it’s highly advised to limit the number of requests sent to a server over a given period (throttling).
To apply throttling, you can add delays between requests by using timeouts or scheduling requests at specific intervals.
Proxies
Using a single IP address for scraping can lead to rate limiting or blocking. Proxies help you avoid this by rotating IP addresses, making your requests appear to come from different sources.
- What are Proxies?
Proxies act as intermediaries between your scraper and the target website. They help distribute your requests across multiple IP addresses, reducing the likelihood of getting blocked.
There are various types of proxies, such as data center proxies, and residential proxies. Each type has its pros and cons, depending on your scraping needs.
Data Center Proxies: Fast and inexpensive but can be easily detected and blocked by sophisticated websites.
Residential Proxies: More expensive but appear as if coming from regular users’ devices, making them harder to detect.
Example: Using Proxies with Axios
By following these best practices, you can ensure your web scraping activities are both effective and ethical.
Alternative: Octoparse Templates
For those who prefer a no-code or low-code solution, we provide pre-built templates that simplify the web scraping process. Octoparse templates are user-friendly and don’t require extensive programming knowledge.

And if you need more advanced settings, you can build your own scraper by navigating the website and clicking the related elements to form a workflow. In the interface below, you can see the website, workflow, and previewed data.
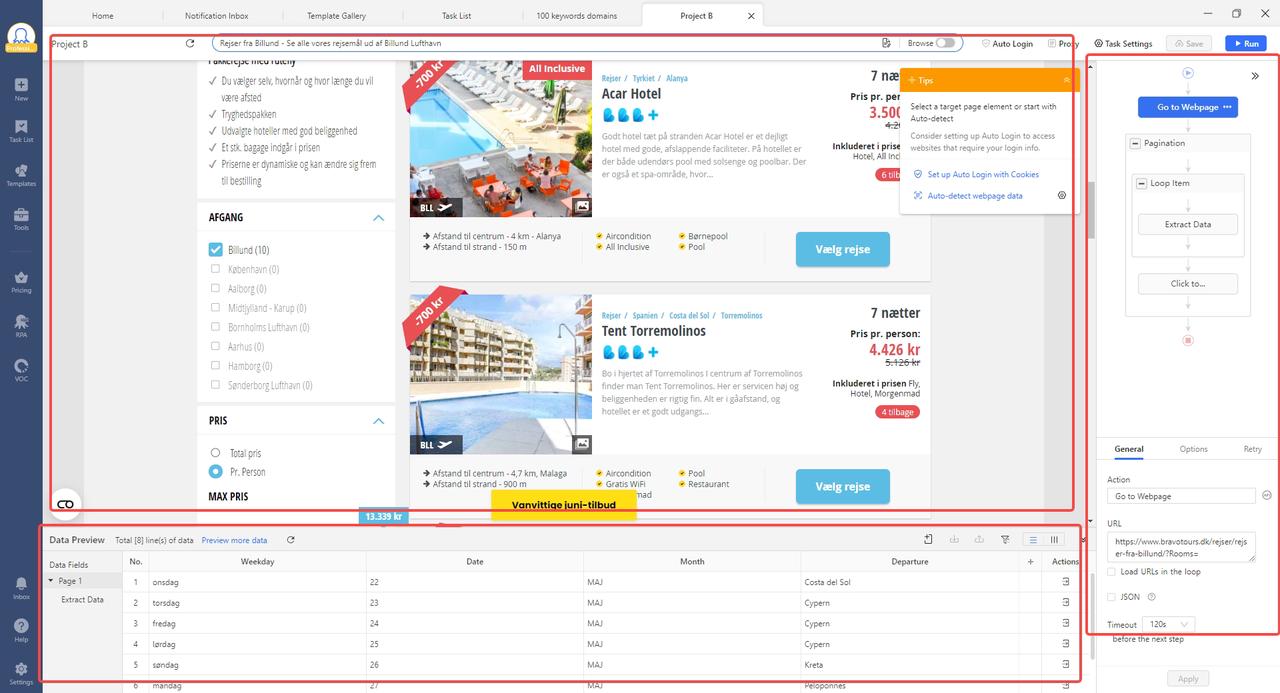
There are also anti-blocking technologies for users to employ, such as Proxies, IP rotation, and CAPTCHAs solving, which can be found within the same interface.
Conclusion
JavaScript is a powerful tool for web scraping, especially when dealing with modern, dynamic websites. Whether you’re fetching static content with Cheerio and Axios, navigating complex pages with Puppeteer, or using jQuery in the browser, JavaScript has you covered. And for those who prefer a simpler approach, Octoparse offers convenient templates to get you started quickly. There are also customization services catered to the needs of every industry. Contact us or check the Octoparse plan!